
In my previous article on Google Cloud federation and account provisioning with Microsoft Entra ID, I showed how to get started to configure it. This article constitutes the second part, utilizing SAML authentication to complete the solution. Once you complete the steps here, you will have a secure means of logging into Google Cloud with your Entra ID account.
To complete this process, you will need to have completed the first portion as documented here.
Create a Google Admin SAML profile#
In Google Admin, go to Security -> Authentication -> SSO with third-party
Click “Add SAML Profile”

Add a SAML profile Give it a name and click Save. You will fill in the other fields later
The page flow will generate SP (Service Provider) URLs for you. These will be needed when creating an Entra ID SSO application
Create a Microsoft Entra ID SSO application#
In Microsoft Entra ID, create another “Google Cloud/G Suite Connector by Microsoft” application
Name it “Google Cloud SSO”

Create an Entra ID SSO application After its creation, go to Manage -> Properties
Ensure that both options are set to “Yes” for “Enabled for users to sign-in” and “Assignment required”
Click Save
Go to Manage -> Users and groups
Click Add user/group to assign a user or group
Since I’m using the free Microsoft Entra ID, I cannot add groups
Go to Manage -> Single sign-on
Click the “SAML” card
Entra ID SAML card In the resulting page, click Edit on step 1
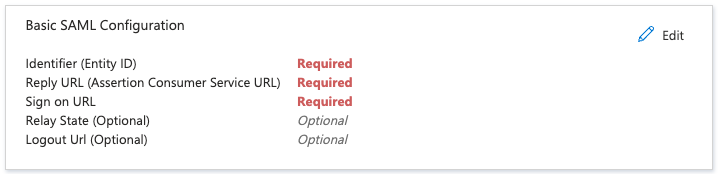
Entra ID SAML configuration In the “Identifier (Entity ID)” section, click the “Add Identifier” link
Paste the “Entity ID” URL from the SSO Profile in Google Admin here and click the Default checkbox
Remove any other entries here resulting with just the single entry
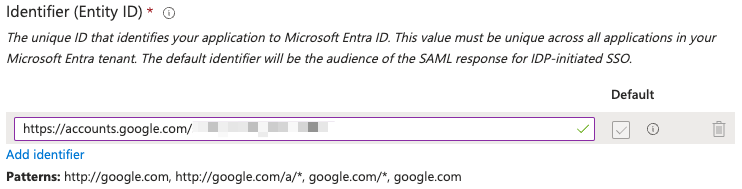
Entra ID Identifier In the “Reply URL (Assertion Consumer Service URL)” section, click the “Add reply URL” link
Paste the “ACS URL” from the SSO Profile in Google Admin here
For the Sign on URL, paste the following, replacing
PRIMARY_DOMAINwith your FQDN: https://www.google.com/a/PRIMARY_DOMAIN/ServiceLogin?continue=https://console.cloud.google.com/Click Save
Close the “Basic SAML Configuration” pane
In step 2, click Edit
Since I am using the Universal Principal Name (UPN) as the identifier, please remove all additional claims and retain only the required claim configured for UPN

Entra ID Attributes Make a note of the Base64 token signing certificate in step 3
Make a note of the following URLs in step 4 “Login URL” “Microsoft Entra Identifier”
Complete the Google Admin SSO profile#
In the IDP details section from step 4 in the Microsoft Entra ID SSO application, paste the “Microsoft Entra Identifier” URL into the IDP entity ID field
Also paste in “Login URL” URL into the “Sign-in page URL” field
Paste the following into the “Sign-out page URL” field: https://login.microsoftonline.com/common/wsfederation?wa=wsignout1.0
PPaste the following into the “Change password URL” field: https://account.activedirectory.windowsazure.com/changepassword.aspx
Upload the Base64 token signing certificate in step 3 in the Microsoft Entra ID SSO application to the Verification certificate
Click Save
The result should look similar to this:
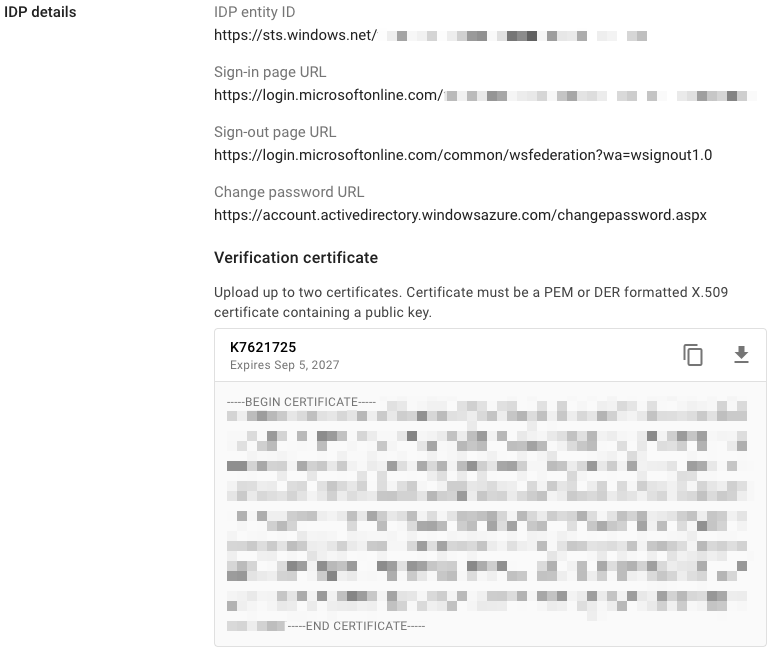
Google Cloud Identity IdP details
Assigning the SSO profile#
In Google Admin, go to Security -> Authentication -> SSO with third-party IdP
In the “Manage SSO profile assignments” section, click the “Get Started” link
In the left pane, select the “Users” OU
In the right pane, select the “Another SSO profile” radio button
In the SSO profile dropdown menu, choose the SSO profile that you created earlier
Your result should look similar to this:
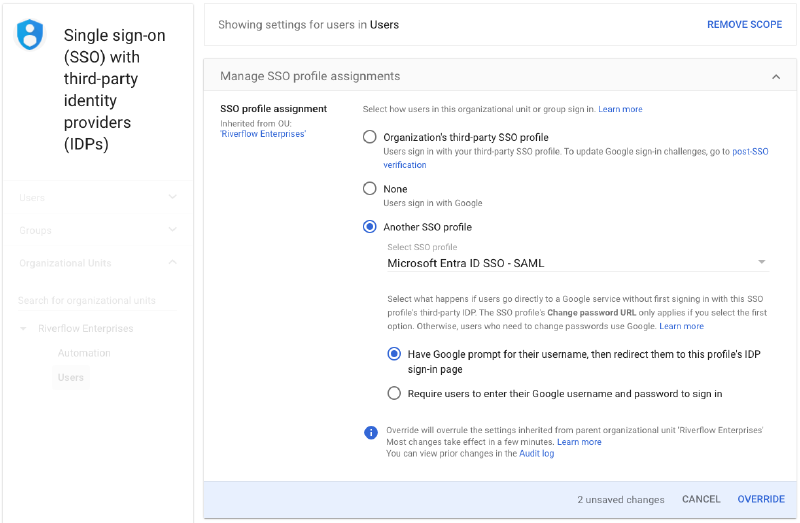
Google Identity SSO Profile assignment Click Override
Click on the Automation OU
Choose None for SSO profile assignment
Click Override
Testing single-sign on#
With an incognito browser window, navigate to https://console.cloud.google.com
Enter the username of an account that the Microsoft Entra ID automation has provisioned
You should get redirected to log into Microsoft Entra ID
If your credentials are correct, you will be redirected back to Google Cloud console
Agree to the terms of service and click “Agree and continue”
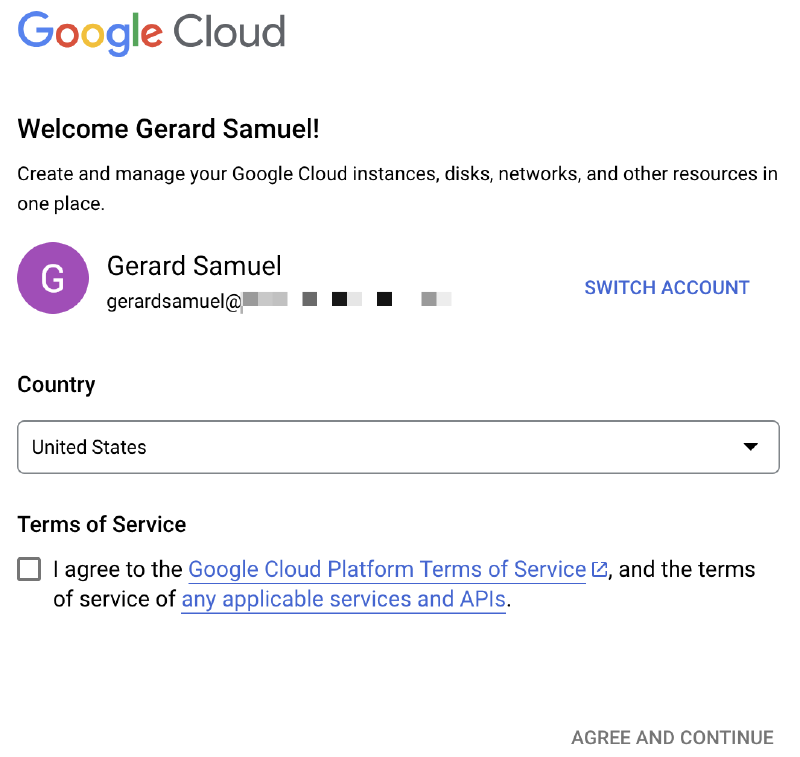
Google Cloud login flow
Conclusion#
And there you have it. If all goes well, this overall solution gives you the following:
- The ability to use one account for both Microsoft/Azure and Google ecosystems
- The basic groundwork to expand into Entra ID’s conditional access
- The foundation to manage access to Google Cloud resources
Have any questions? Feel free to reach out to me.
Thanks! 👋