How to setup a self-managed Podman Gitlab Runner
Estimated reading time: 5 minutes
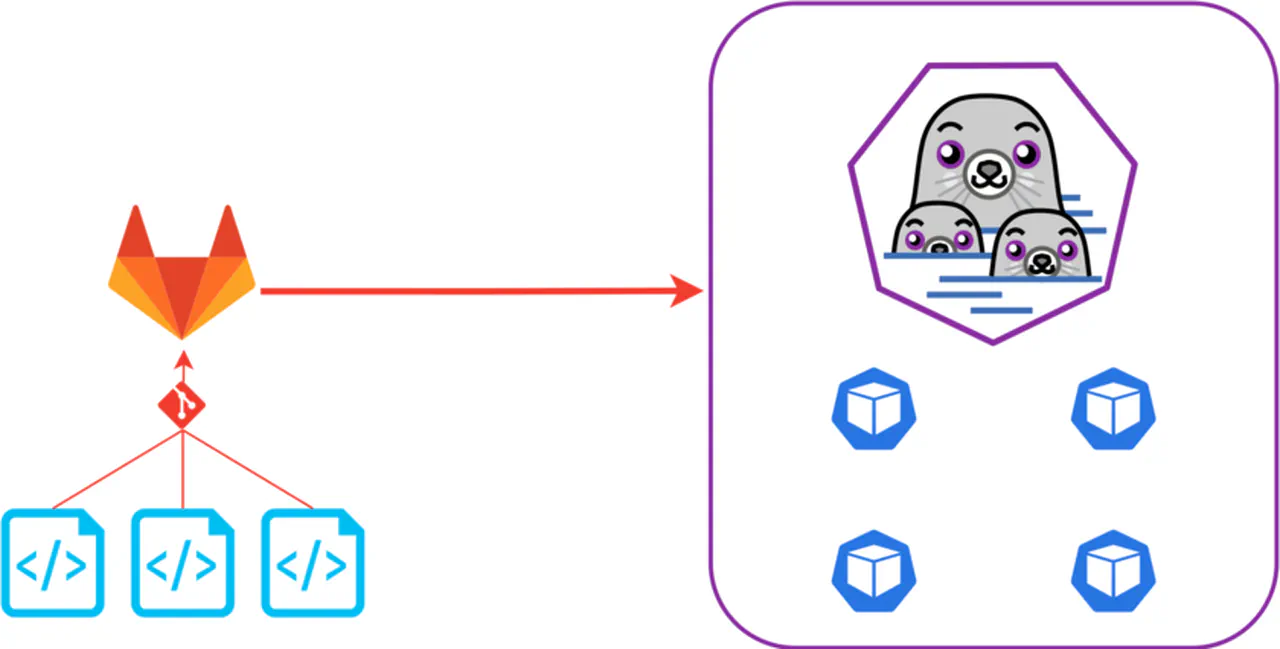
I want to get my hands dirty with CI/CD. After looking around at cloud-hosted options such as Google Cloud Build and Azure DevOps/Pipelines, I decided to keep this process local by leveraging self-managed GitLab CI/CD pipelines.
To run a GitLab pipeline, you need only a special configuration file, .gitlab-ci.yml, at the root of your GitLab project/repository and at least one or more compute resources to execute jobs. In this article, I will discuss how I set up a GitLab runner using Podman.
A GitLab Runner, in its simplest form, is a compute resource capable of executing jobs defined in a pipeline and can be installed on Windows, FreeBSD, and Linux. Once installed, GitLab registers the compute endpoints and can send commands to the compute endpoint using the instructions laid out in the pipeline. There are a few other ways to run the GitLab Runner application. You can also use Docker or Kubernetes to execute GitLab runner pipelines. I chose this route because I can use Podman as a drop-in replacement for Docker, and GitLab supports it. I chose this method instead of installing static applications, which could lead to operating system bloat and the risk of inconsistent results because job containers are ephemeral. The goal is to keep a pristine operating system and use throw-away containers to execute jobs.
Installation
For my needs which is a bit overkill, I am deploying two virtual machines running Fedora, each with the following specs:
- 4 vCPU
- 4GB RAM
- 20GB HDD
Install the latest version of GitLab Runner:
sudo dnf install --assumeyes \
  https://s3.dualstack.us-east-1.amazonaws.com/gitlab-runner-downloads/latest/rpm/gitlab-runner_amd64.rpm
Registration
Now that I have installed the GitLab Runner, I can register the compute nodes in GitLab.
-
Log into GitLab
-
Go to your parent GitLab root group
-
On the left pane, go to
Settings -> CI/CD -
Expand
Runners -
Ensure that instance runners are enabled for the group

Enabling GitLab instance runners -
Now go to Build -> Runners
-
Click the
New group runnerbutton
Creating a new group runner -
On the New group runner page, ensure that
Run untagged jobsis enabled, and forRunner description, enter the name of the server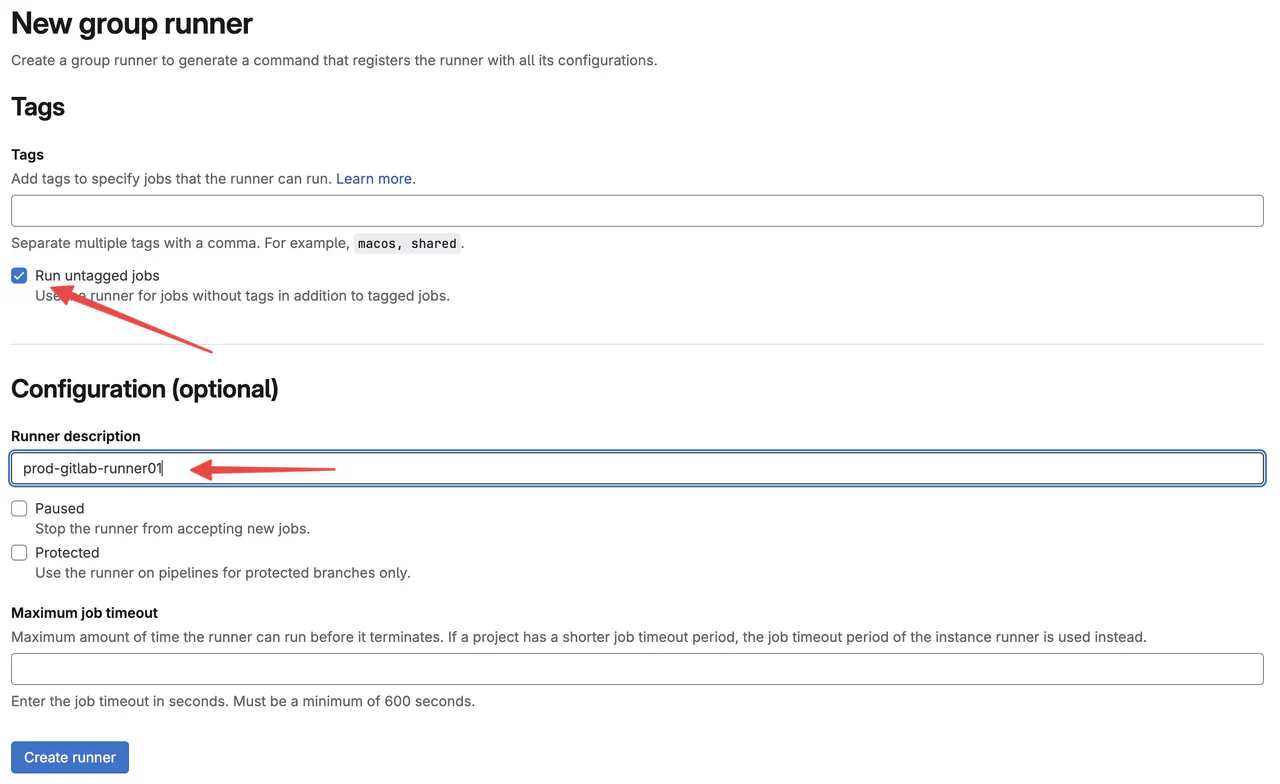
Group runner options -
Click the
Create runnerbutton -
On the next page, you will get a command to run on your runner virtual machine. Copy it.
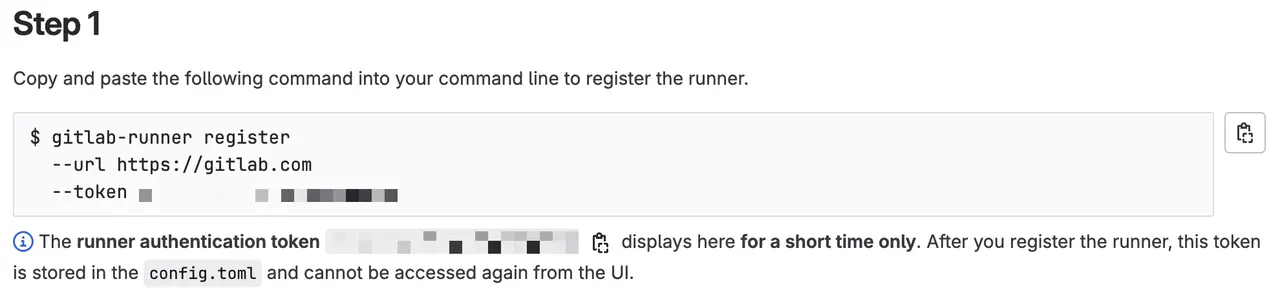
Group runner registration command -
Run the generated command from the previous step with
sudoprivileges
sudo gitlab-runner register
  --url https://gitlab.com
  --token <generated-token>
-
Accept the defaults until the question about which executor to use
-
Enter
docker
-
For the default Docker image question, enter
alpine:latest -
If all goes well, the wizard will complete, showing the location of the configuration file
/etc/gitlab-runner/config.toml -
Validate that the service is running
systemctl status gitlab-runner
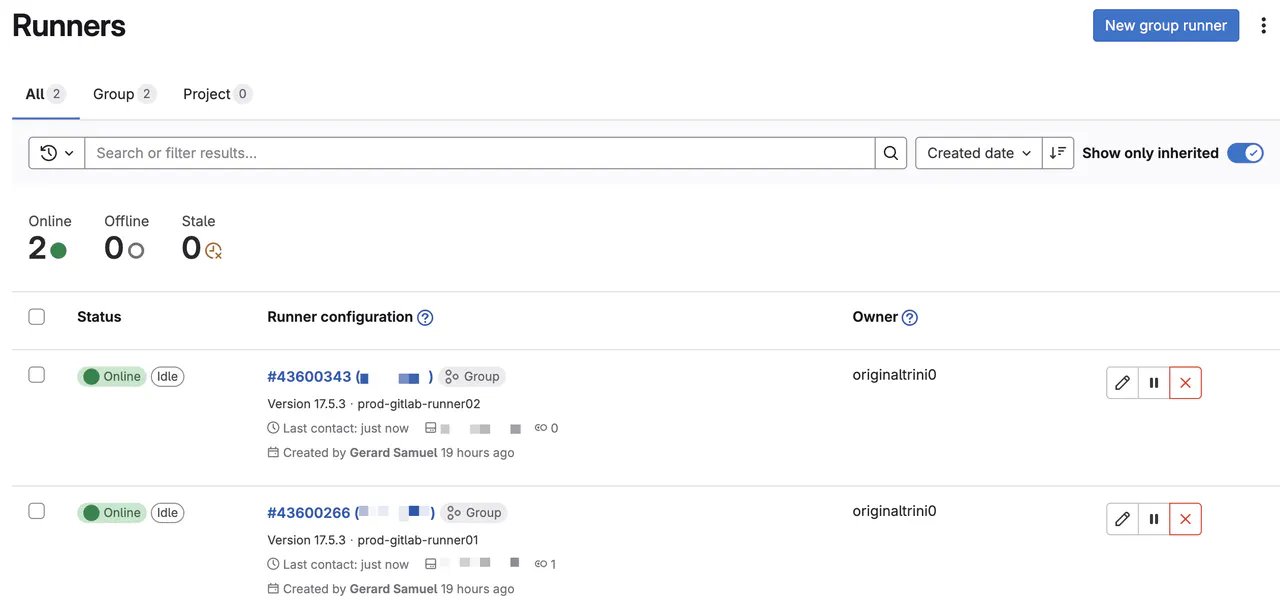
Go back to the GitLab portal. At the bottom, there is a button called View runners. Click it to view your registered runners!
Podman configuration
I will configure the Gitlab runner application to use Podman in this section.
- Allow runners to create a container network by enabling the
FF_NETWORK_PER_BUILDfeature flag
sudo tee --append /etc/gitlab-runner/config.toml << EOF > /dev/null
  [runners.feature_flags]
    FF_NETWORK_PER_BUILD = true
EOF
- TThe GitLab runner application created a
gitlab-runneruser account. Add the user account to the/etc/subuidand/etc/subgidfiles
x=$(tail -n 1 /etc/subuid | cut -d ':' -f 2)
sudo usermod --add-subuids $((x+65536))-$((x+(65536*2)-1)) gitlab-runner

x=$(tail -n 1 /etc/subgid | cut -d ':' -f 2)
sudo usermod --add-subgids $((x+65536))-$((x+(65536*2)-1)) gitlab-runner
I must log in as the gitlab-runner user account to continue the configuration.
- Temporarily configure a password for the gitlab-runner user account
sudo passwd gitlab-runner
- Temporarily enable SSH password login
sudo sed -i 's/PasswordAuthentication no/PasswordAuthentication yes/' /etc/ssh/sshd_config.d/50-cloud-init.conf

sudo systemctl reload sshd
- Log into the gitlab-runner account with the temporary password
ssh -o PreferredAuthentications=password -o PubkeyAuthentication=no gitlab-runner@localhost
- As the gitlab-runner account, enable and start the Podman socket. Then, check the status of the service
systemctl --user --now enable podman.socket

systemctl status --user podman.socket
Note the Listen line from the previous step’s systemctl status output. We need the path to the socket file.
For example, it could look similar: Listen: /run/user/992/podman/podman.sock (Stream)
- Logout of the gitlab-runner shell
logout
- Remove the temporary password on the gitlab-runner user account
sudo passwd -ld gitlab-runner
- Disable SSH password authentication
sudo sed -i 's/PasswordAuthentication yes/PasswordAuthentication no/' /etc/ssh/sshd_config.d/50-cloud-init.conf

sudo systemctl reload sshd
- Remove localhost from SSH’s known_hosts
ssh-keygen -R localhost
- Configure the gitlab-runner shell to linger
sudo loginctl enable-linger gitlab-runner
- Now I will add the path to Podman’s socket file to
/etc/gitlab-runner/config.toml
sudo sed -i '/\[runners.docker\]/a\ host = "unix:\/\/\/run\/user\/992\/podman\/podman.sock"' /etc/gitlab-runner/config.toml
- Restart the gitlab-runner service
sudo systemctl restart gitlab-runner
Testing the solution
-
Create a test GitLab project
-
In the newly created project, turn off GitLab’s hosted instance runners by navigating to
Settings -> CI/CD -> Runners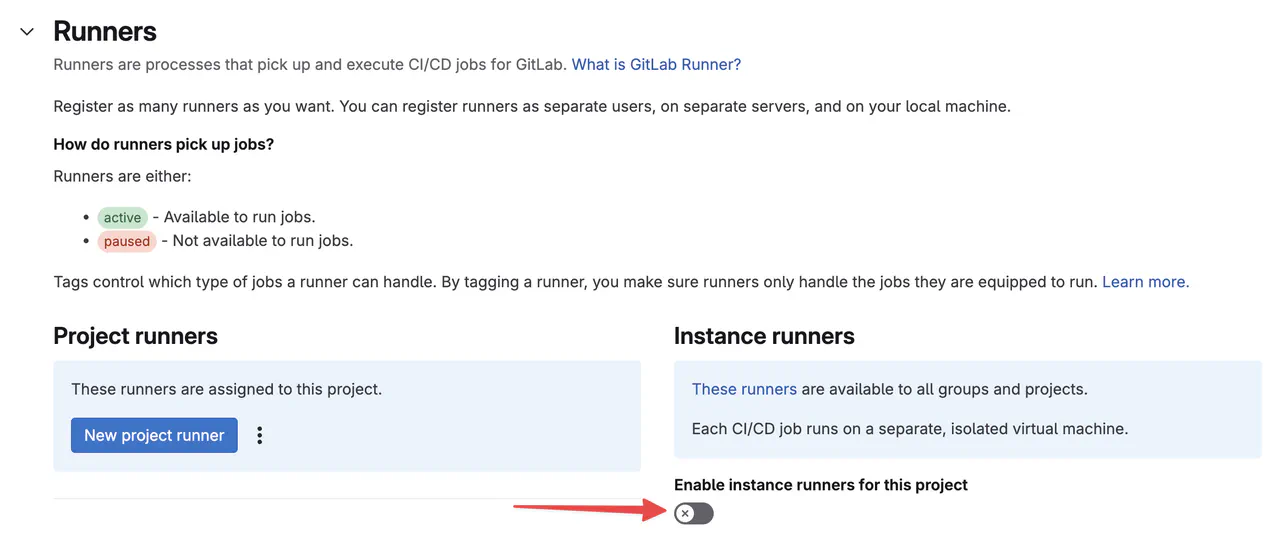
Turning off GitLab hosted runners -
Commit a
.gitlab-ci.ymlfile to the root of the project with the following content
build-job:
  stage: build
  script:
    - echo "Hello, $GITLAB_USER_LOGIN!"

test-job1:
  stage: test
  script:
    - echo "This job tests something"

test-job2:
  stage: test
  script:
    - echo "This job tests something, but takes more time than test-job1."
    - echo "After the echo commands complete, it runs the sleep command for 20 seconds"
    - echo "which simulates a test that runs 20 seconds longer than test-job1"
    - sleep 20

deploy-prod:
  stage: deploy
  script:
    - echo "This job deploys something from the $CI_COMMIT_BRANCH branch."
  environment: production
-
Once the commit has gone through, go to
Build -> Pipelinesto get a visual overview of the steps and statuses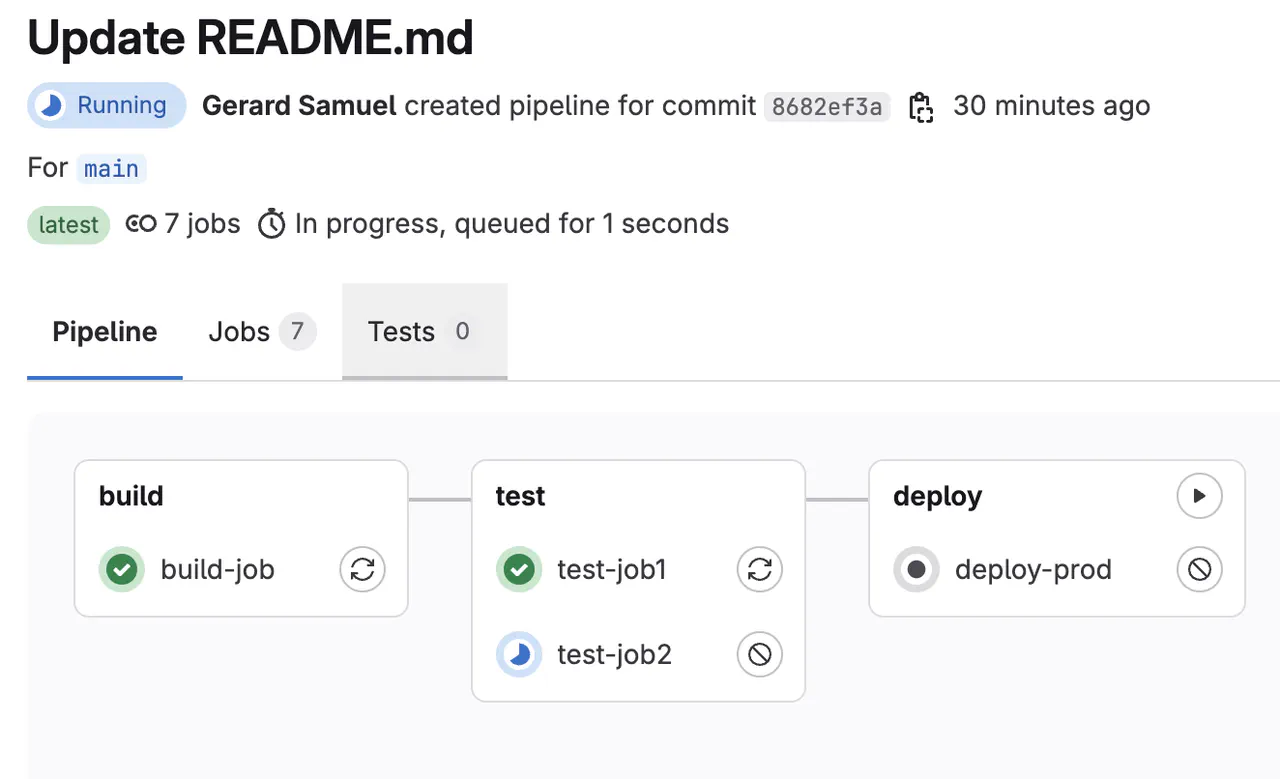
Viewing job statuses -
Drill into one of the steps to see its execution progress. You should see something similar to this if all goes well
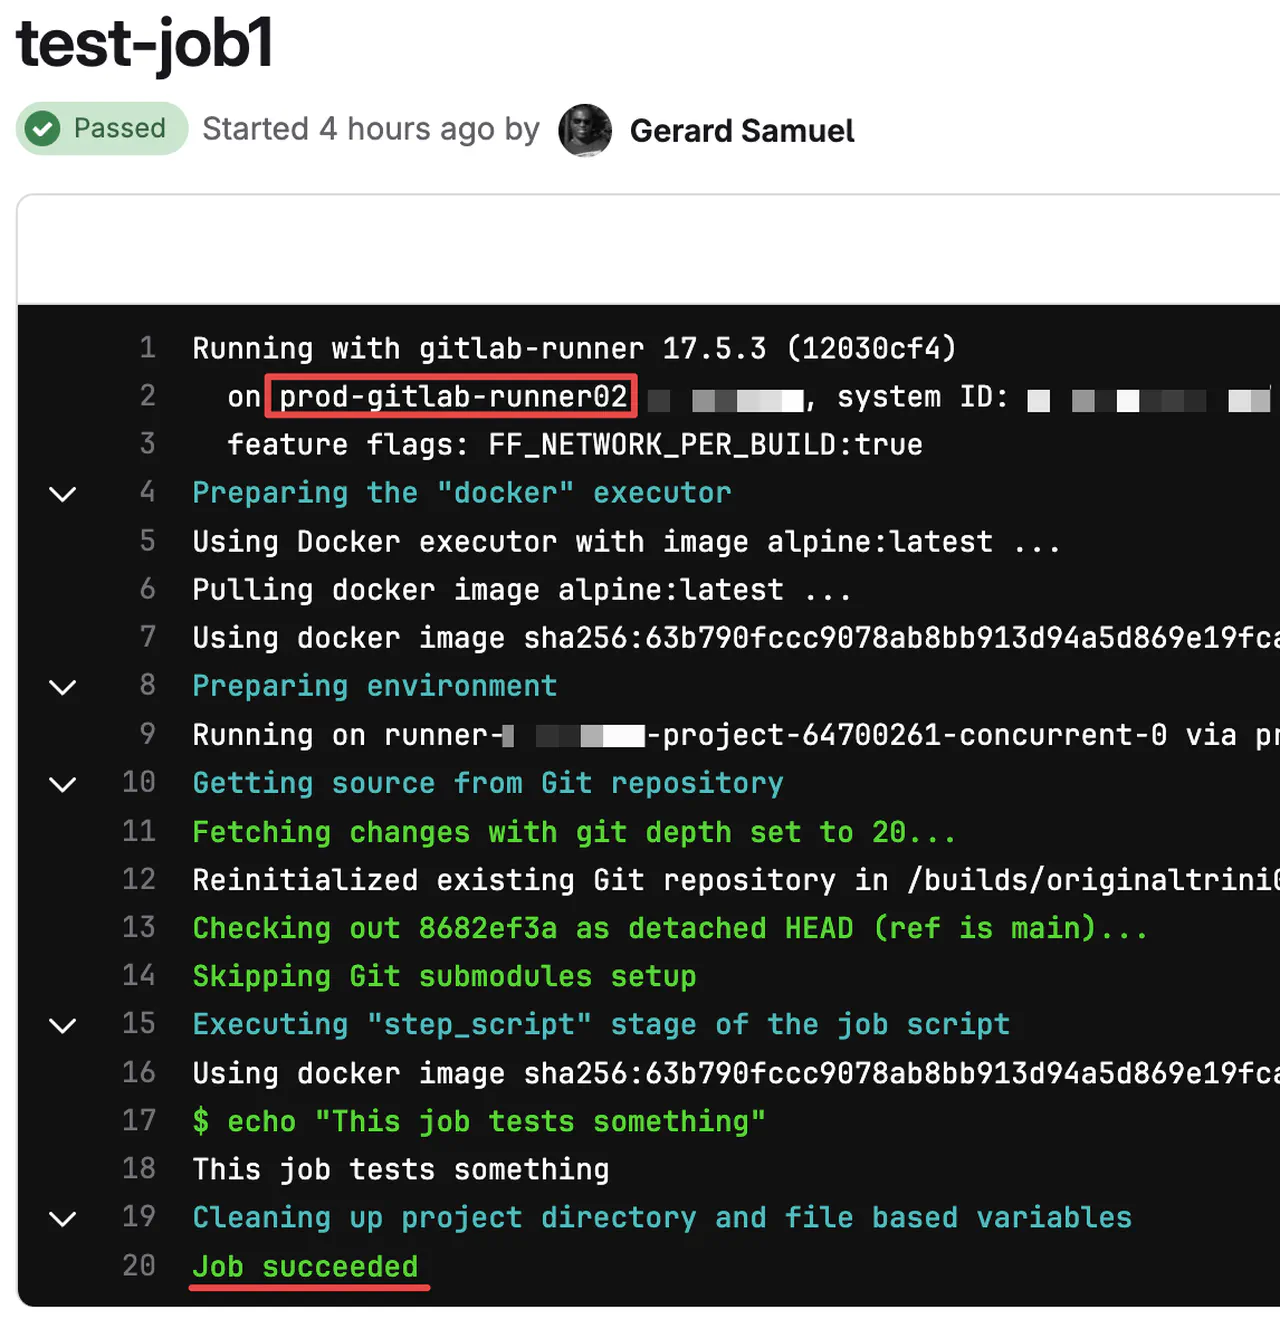
Viewing test-job1 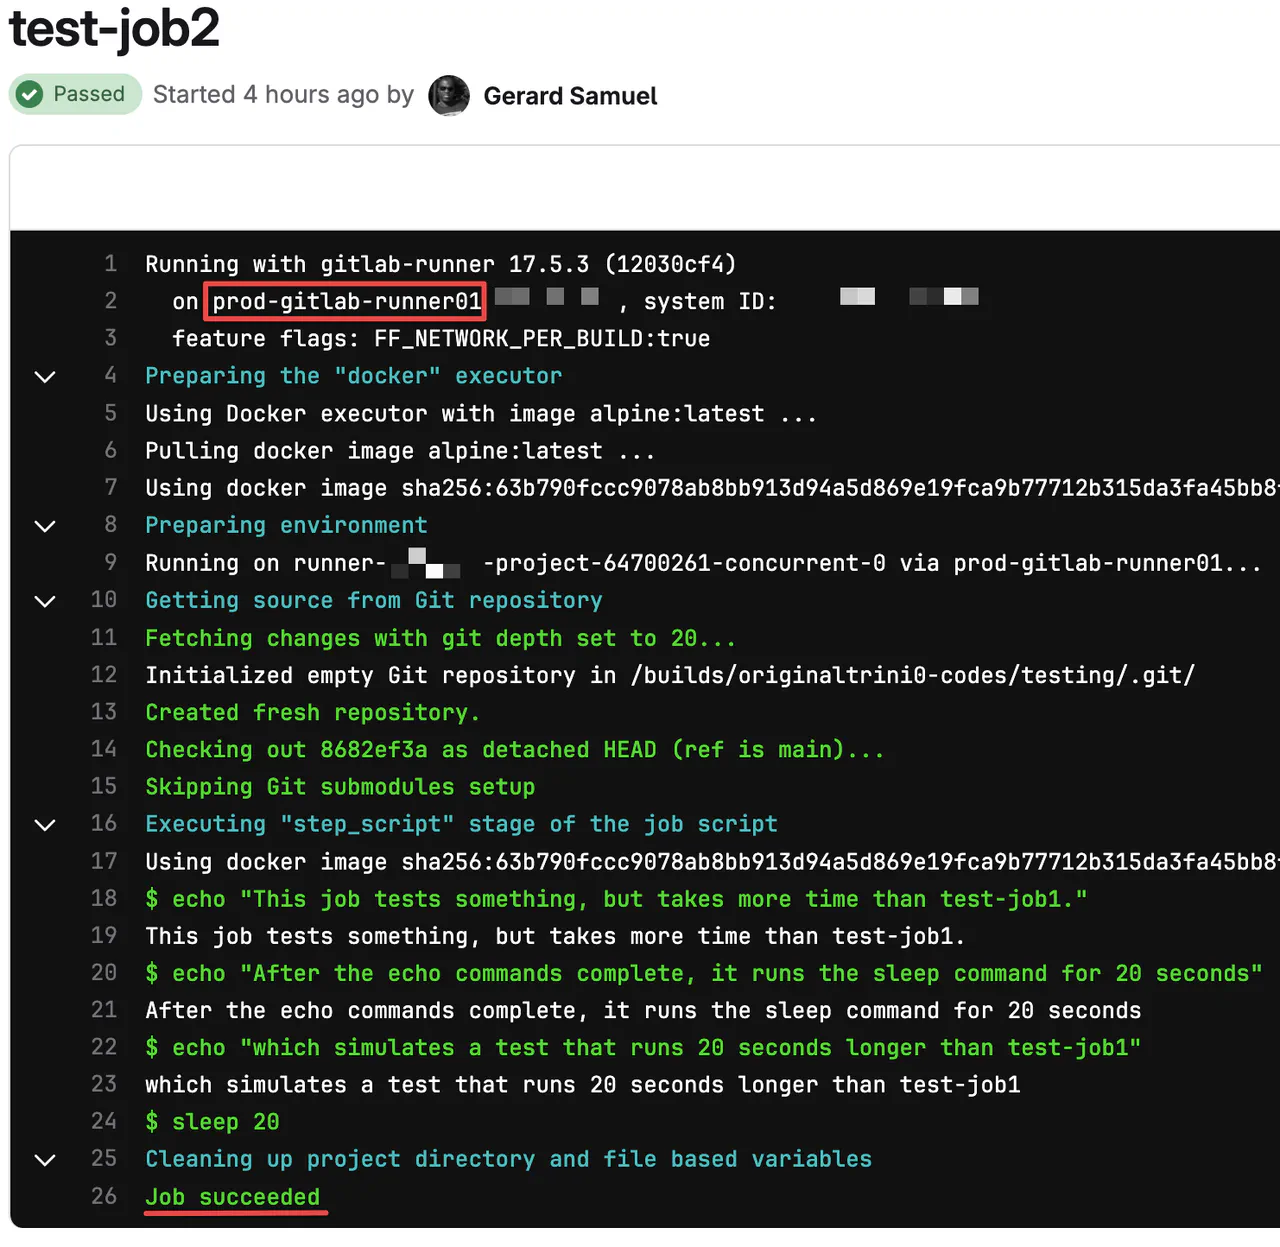
Viewing test-job2
Conclusion
With all the steps completed, you will have a base solution that allows you to programmatically execute pipelines to do almost anything you can think of. You can define custom container images in the .gitlab-ci.yml file, and shell scripting will create new opportunities to automate tasks! To learn more about the .gitlab-ci.yml configuration options, head to this page.