Google Cloud federation with Microsoft Entra ID - Part 1
Estimated reading time: 5 minutes

I wanted to use a single account to log into my Azure and Google Cloud environments and automatically provision “source of truth” accounts from Entra ID to Google Cloud Identity. This article will explain how I configured account provisioning of the identity federation solution between Microsoft Entra ID and Google Cloud Identity.
Prerequisite
For this excercise, here are the basic items that I used for this solution
-
An internet domain name. For example:
domain.tld -
A Microsoft 365 business account using your domain name
-
A free Google Cloud Identity account
To create a Cloud Identity account, go to the Google Cloud Identity sign up page and follow the setup instructions for a free account.
After creating your account, you must verify that you own the domain. The sign-up form will generate a unique code for your DNS record during the sign-up process. To complete the verification, create a TXT record using this code in your domain registrar or DNS portal, and follow the DNS verification steps to finish the process.
Google admin steps
-
Log into the Google Admin console with your credentials used when signing up for Google Cloud Identity
-
Create a break glass account under Directory -> Users for emergencies. Do save the credentials in a Password manager. It can be used to log into the Google Admin console if the federation solution is not working and access is needed.
Creating an account in Google Admin
-
Create an OU for the Microsoft Entra ID automation account at Directory -> Organizational Units. Highlight the organization root and click the “+” button
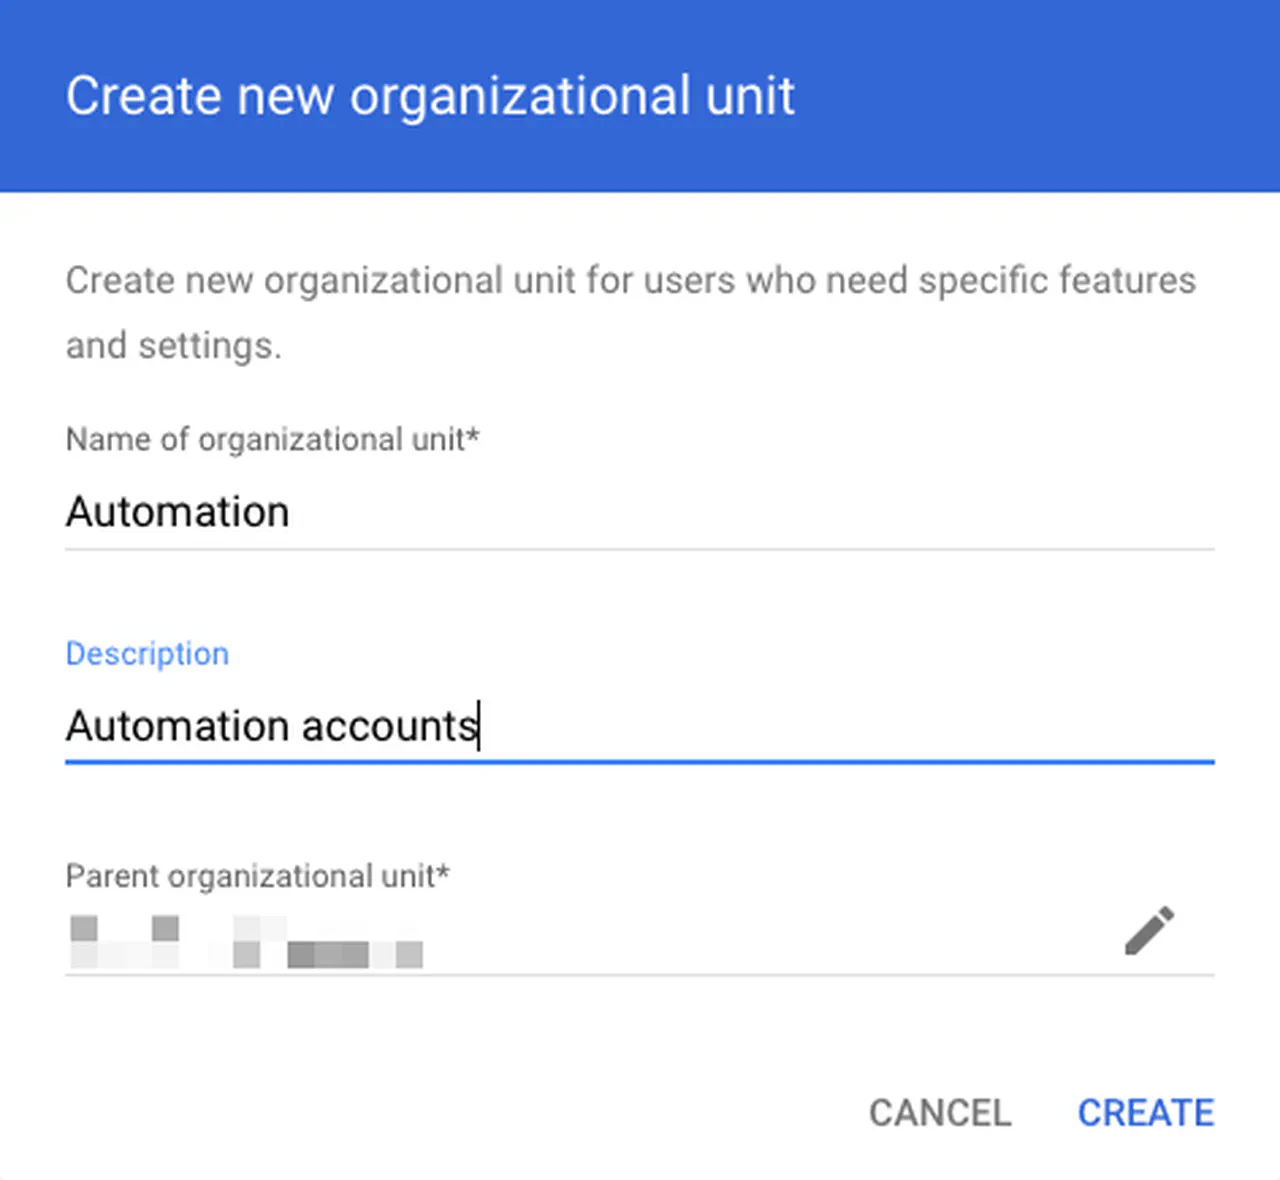
Creating an OU in Google Admin -
Click Create
-
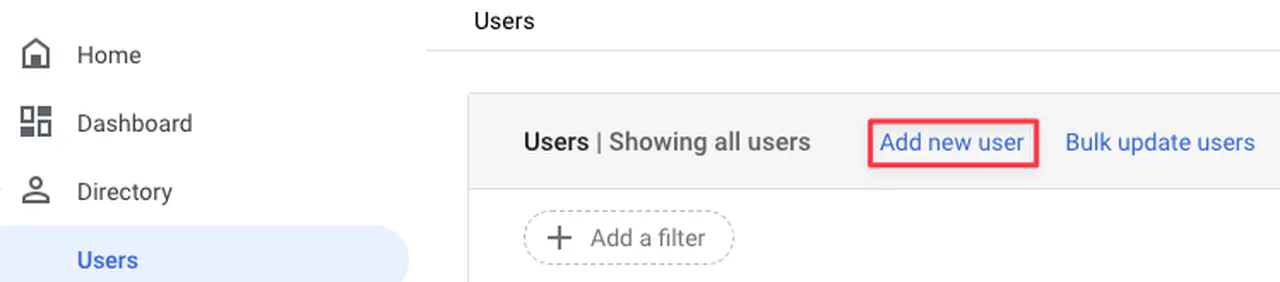
Go to Directory -> Users and create a new account that Microsoft Entra ID will use
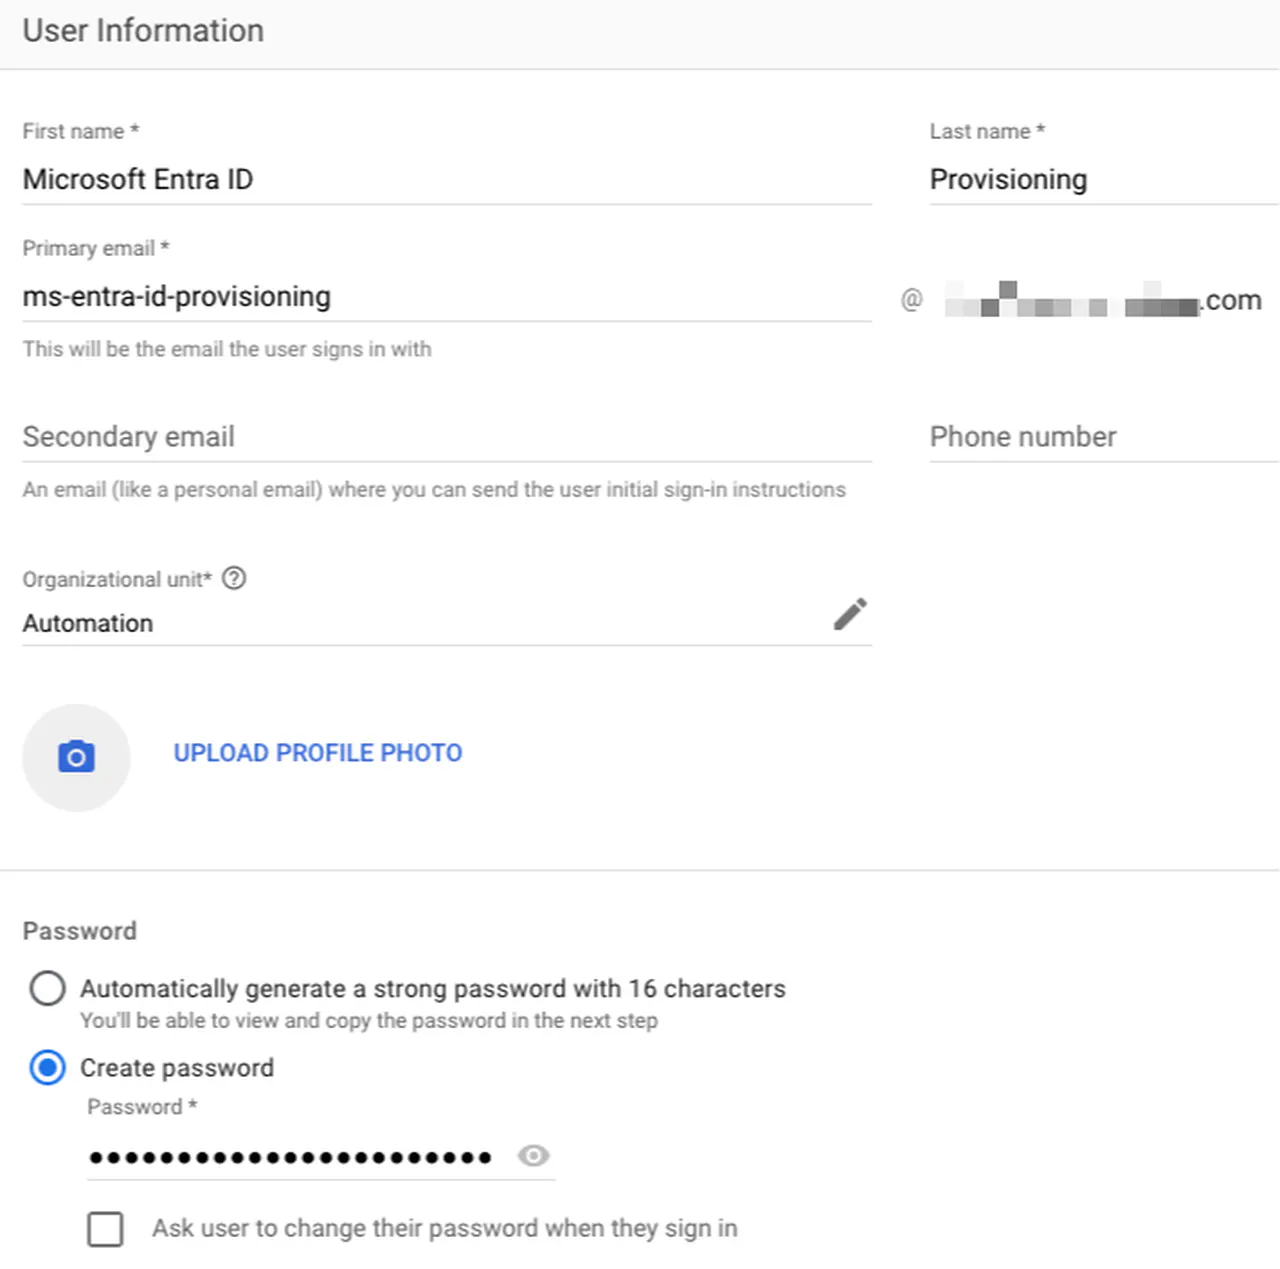
Entra ID account details -
Grant permissions for the automation account via a custom role. Navigate to Account -> Admin Roles and click on “Create new role”
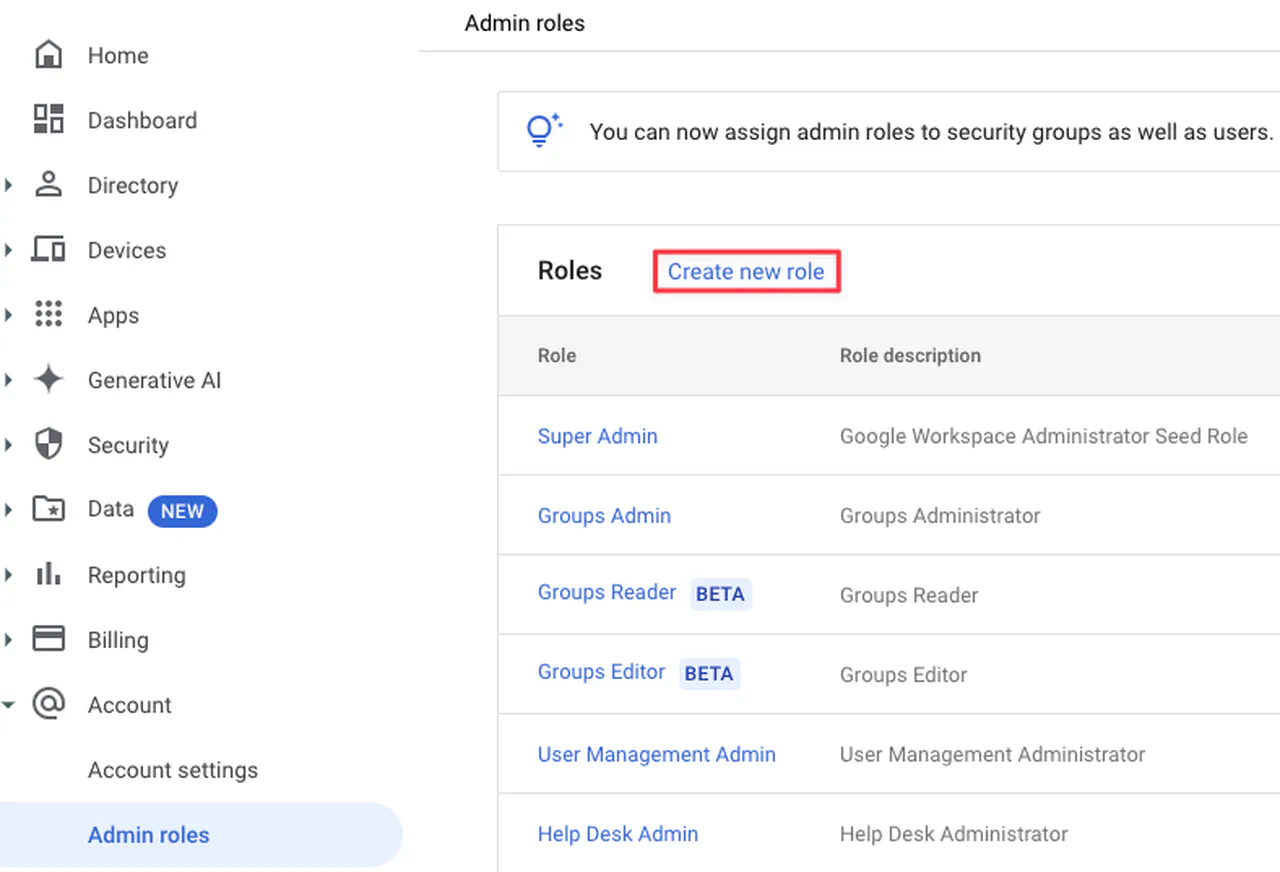
Creating an admin role -
Provide a name and description. Click Continue
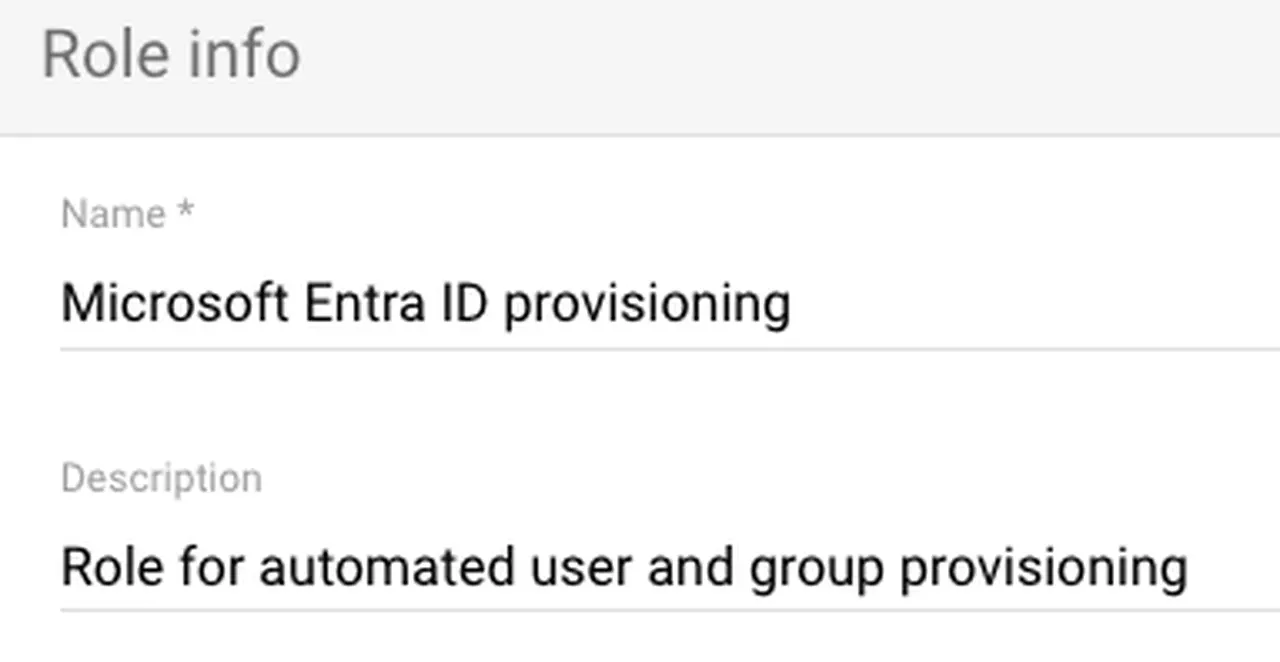
Google Admin role name and description -
Grant Organizational Units -> Read, Users and Groups. Click Continue
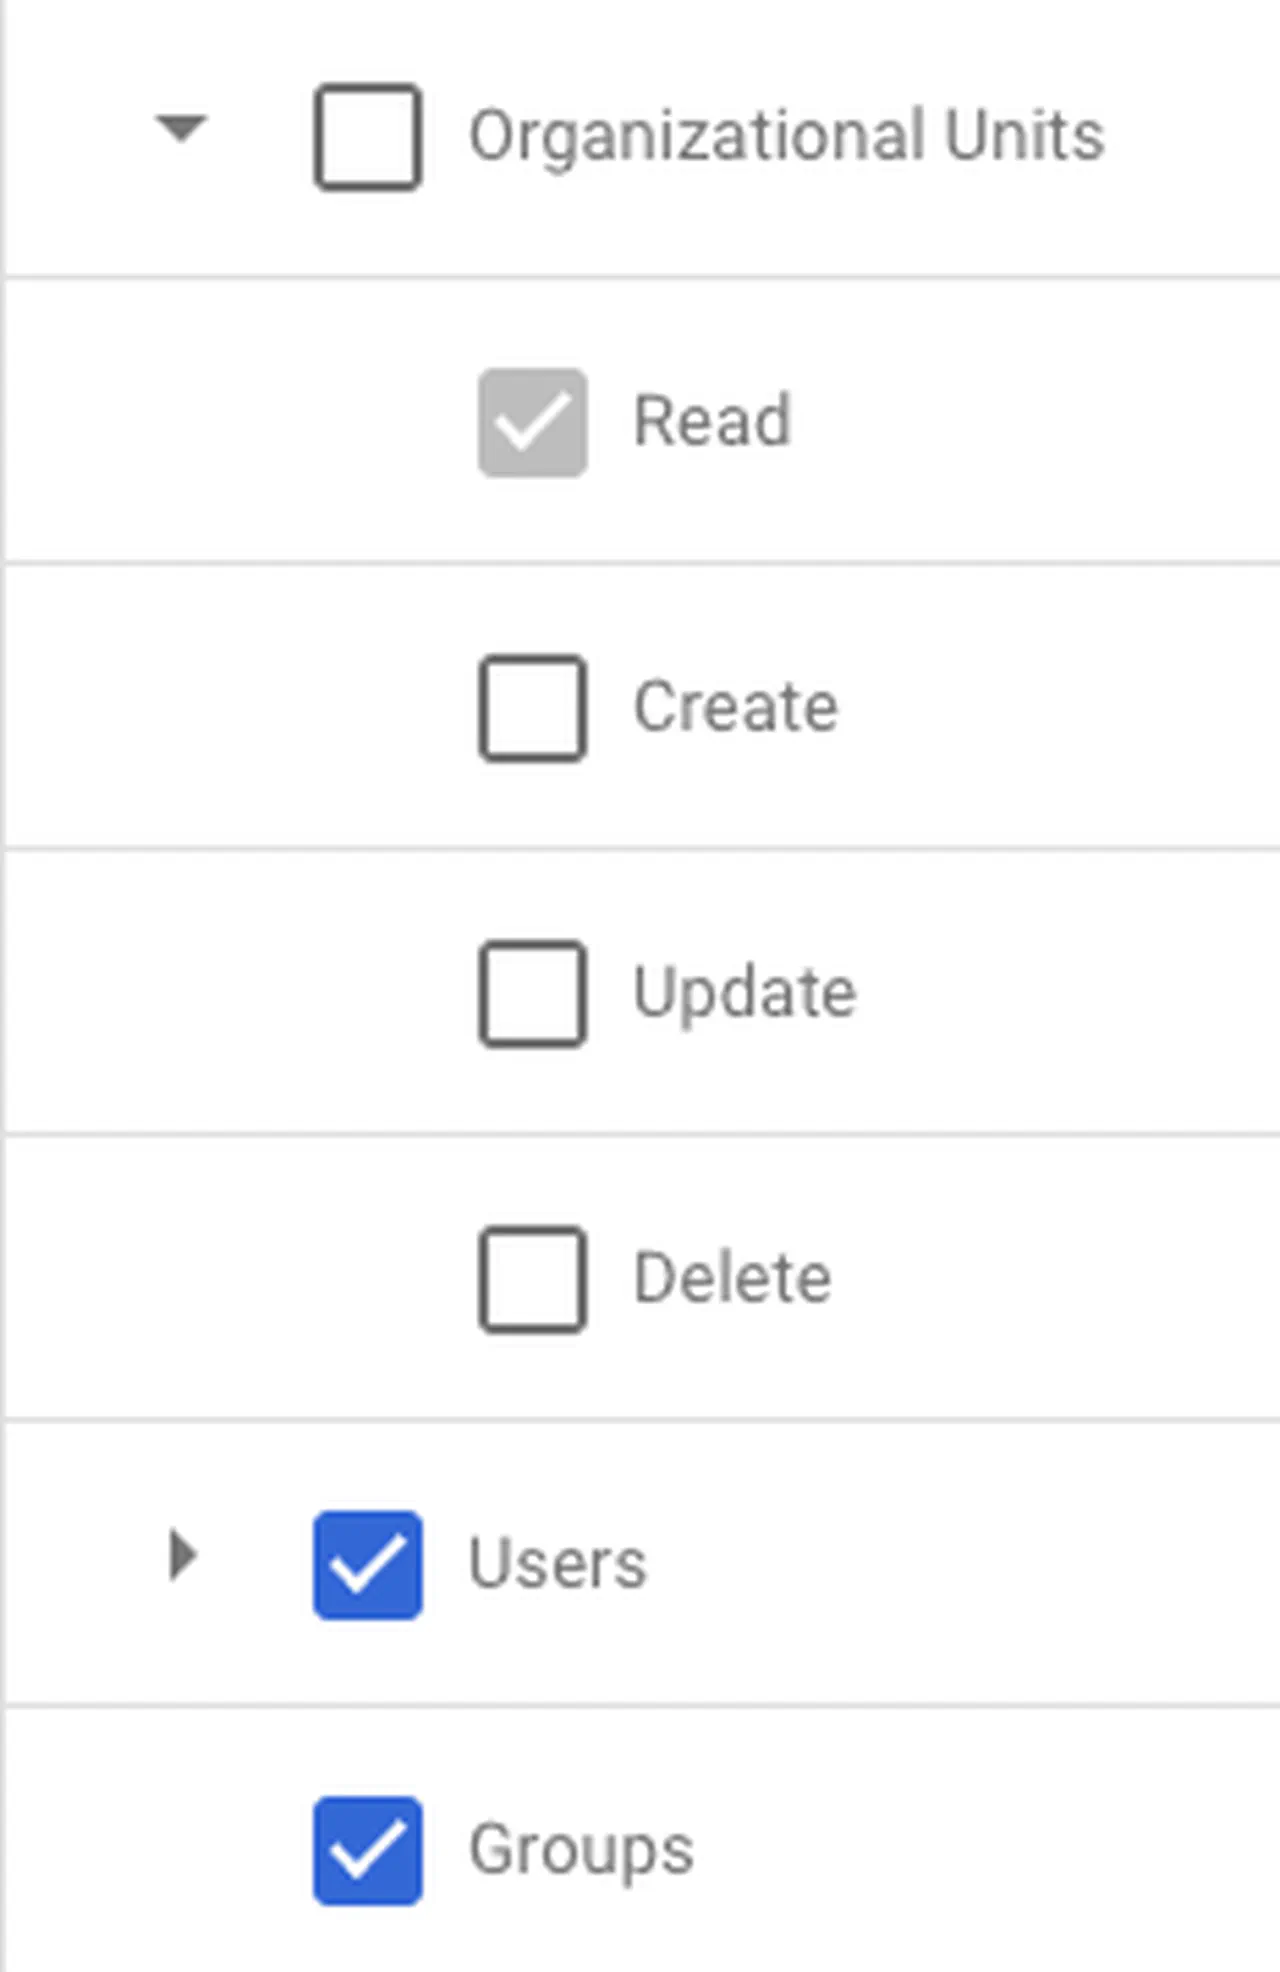
Google Admin role rights -
Click on Create Role
-
Now to assign accounts, click on Assign members
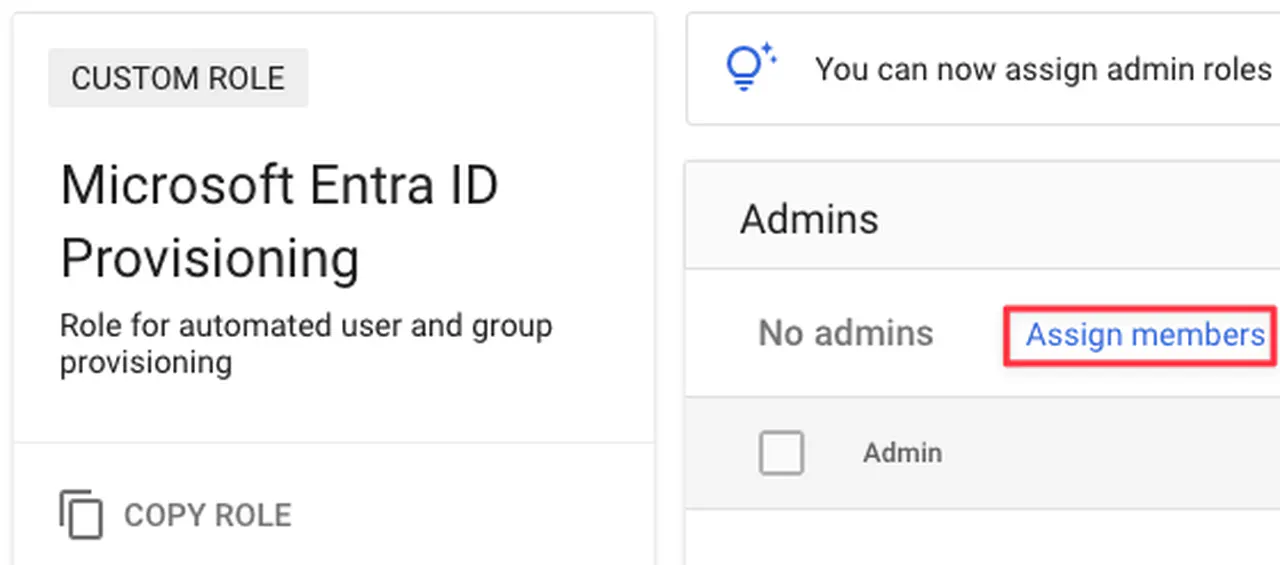
Assigning an account to a role -
Search for the account and click on Assign Role
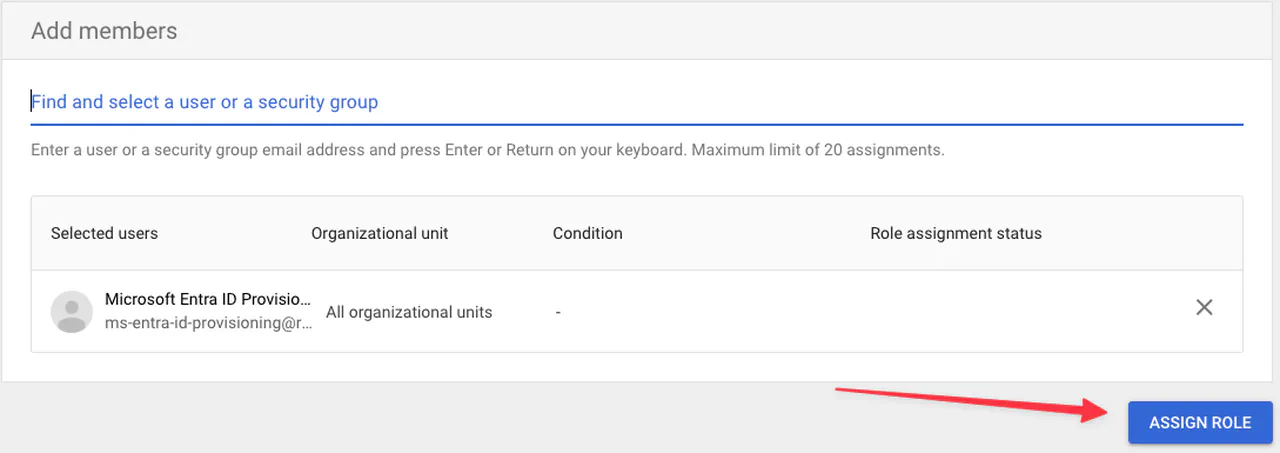
Assigning an account to a role -
Create another OU for Microsoft Entra ID provisioned accounts
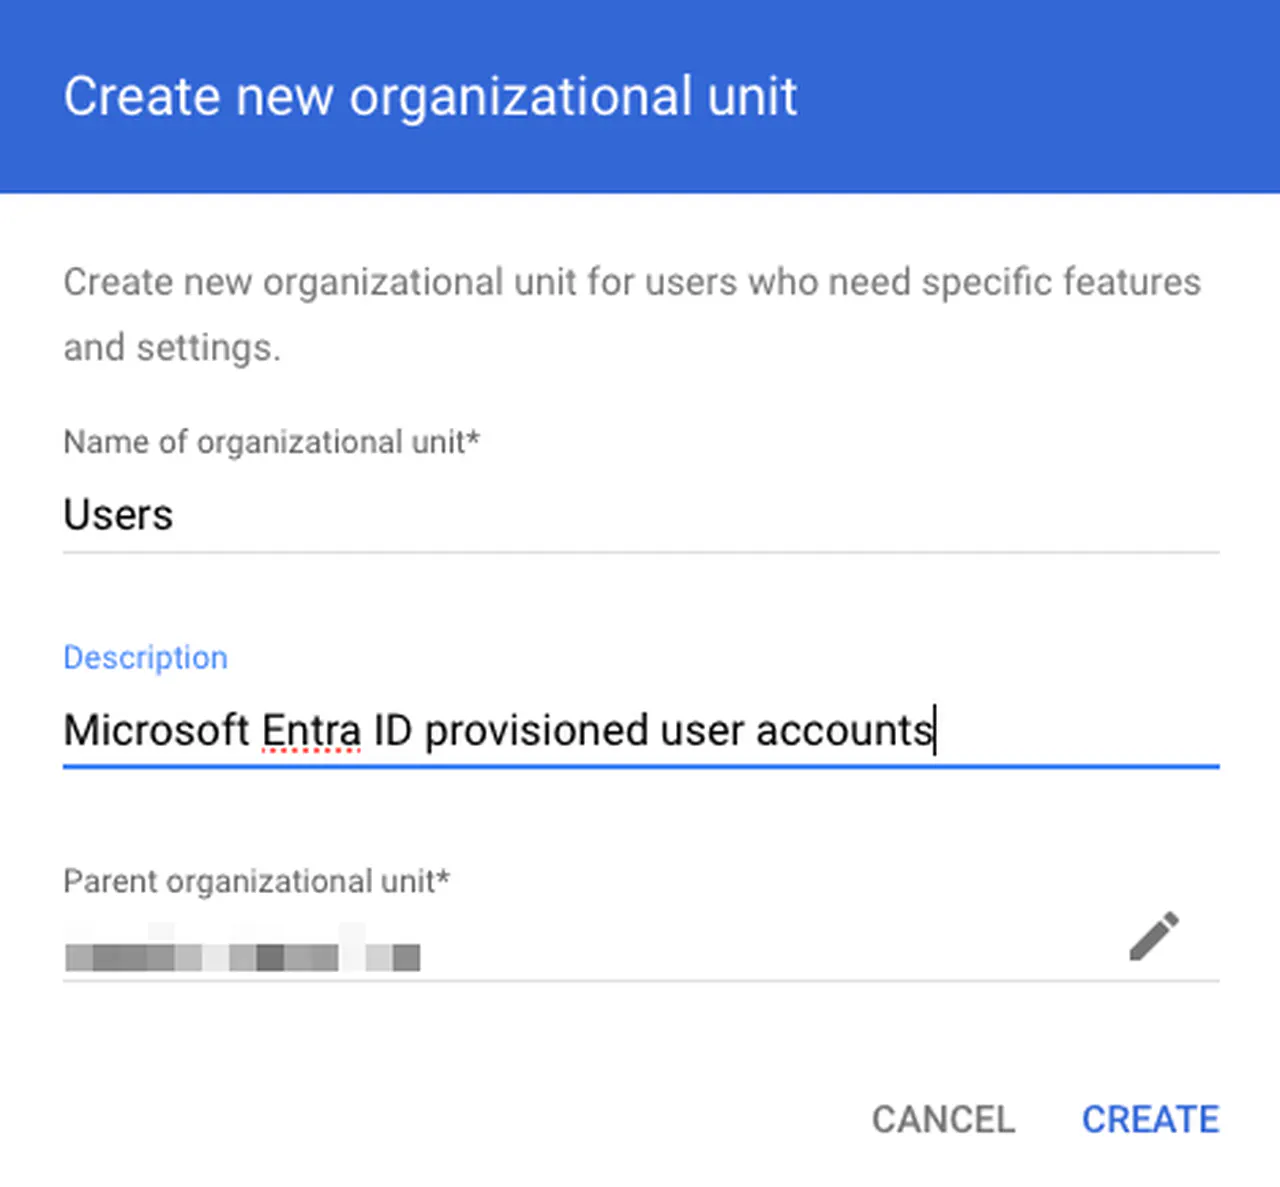
Creating an OU in Google Admin
Microsoft Entra ID Provisioning steps
-
In the Azure Portal, go to Microsoft Entra -> Enterprise applications
-
Click on New application

Creating a Microsoft Entra ID application -
Search for “Google Cloud” and click on the “Google Cloud / G Suite Connector by Microsoft” app
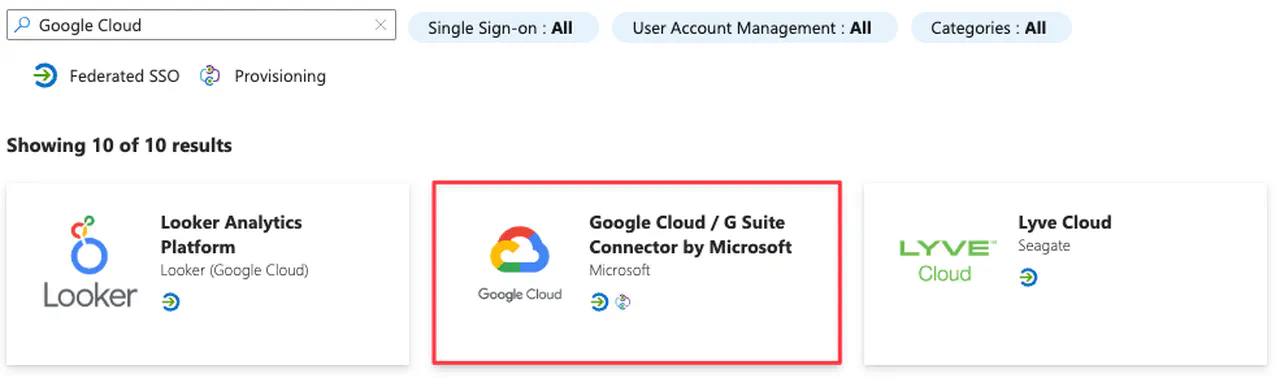
Entra ID built-in applications -
Rename the app to something meaningful and click Create
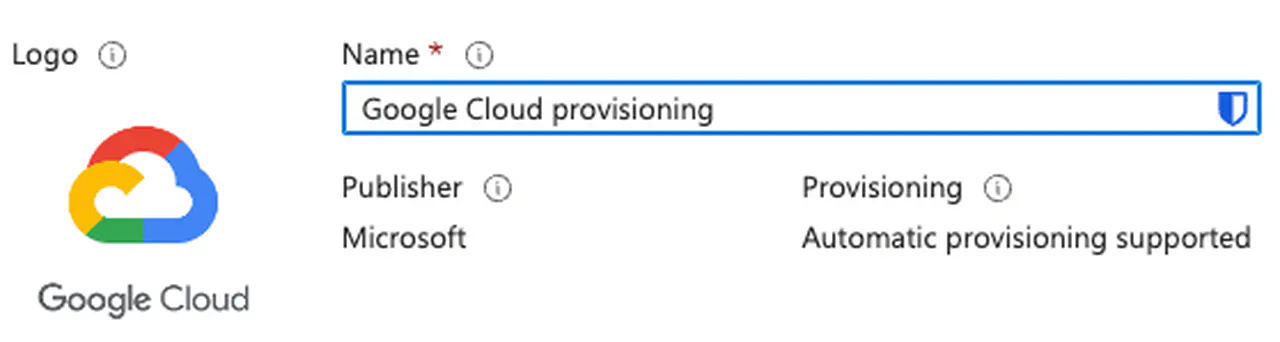
Google Cloud Entra ID application -
On the left, go to Manage -> Properties
-
Select No for:
-
“Enabled for users to sign-in”
-
“Assignment required”
-
“Visible to users”
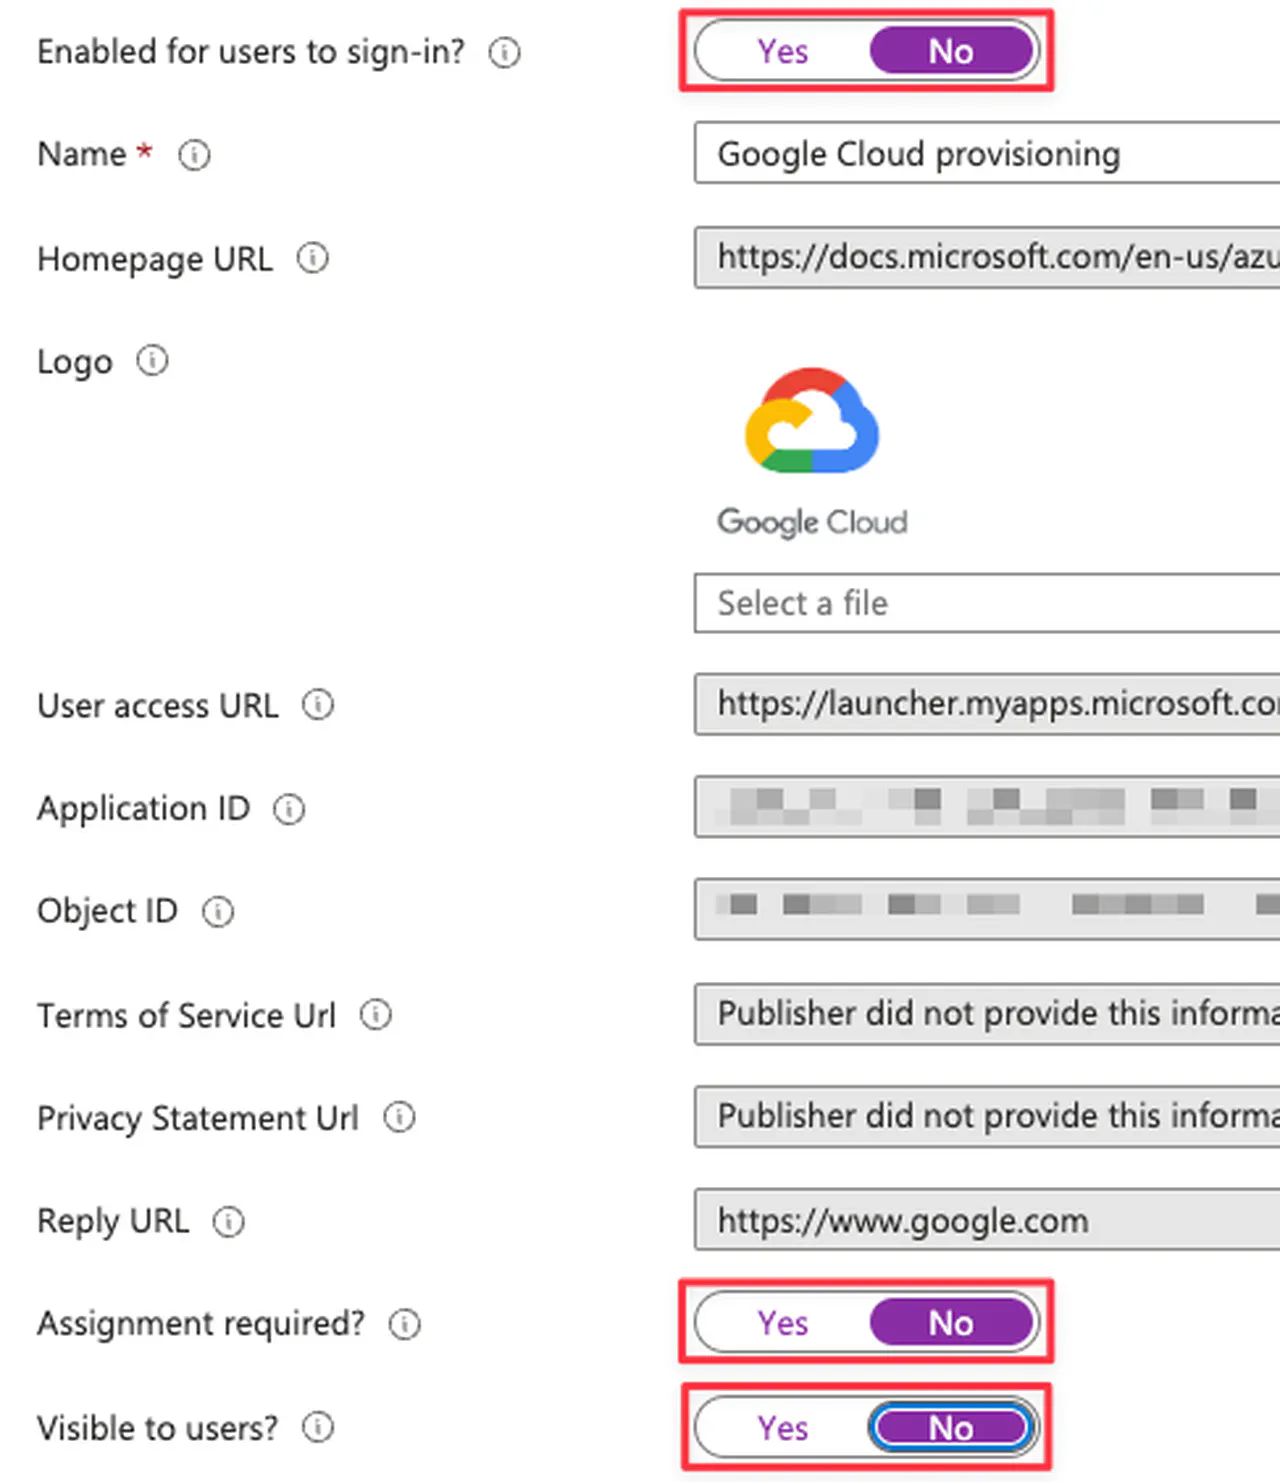
Entra ID application configuration
-
-
Click Save towards the top
-
Go to Manage -> Provisioning and click “Get Started”
-
Change “Provisioning Mode” to Automatic
-
Under Admin Credentials, click Authorize
-
Enter the username/password for the provisioning account that you created earlier in Google Admin
-
Click the “I understand” button to the new account agreement
-
Choose “Select All”
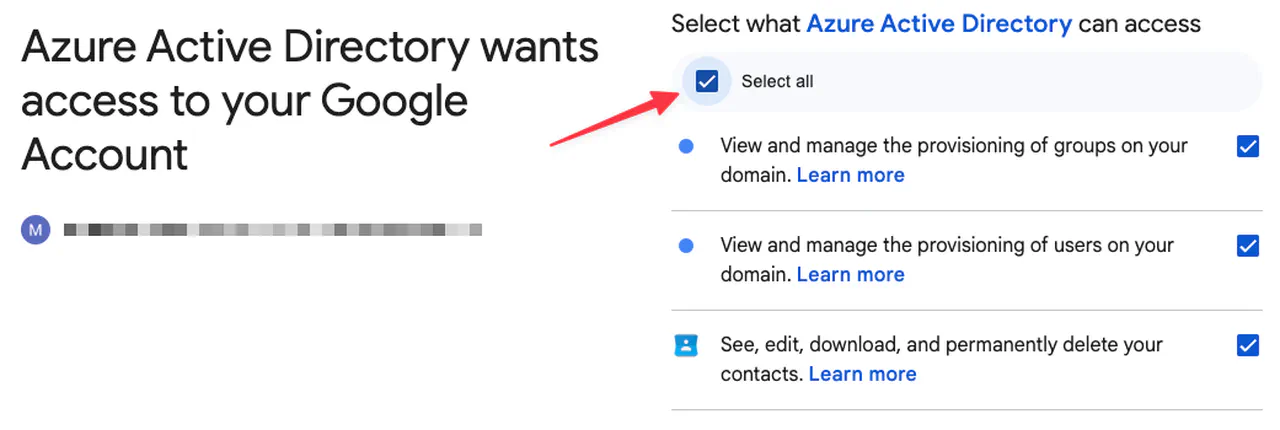
Choosing what Entra ID can access -
Click Continue
-
Click the “Test Connection” button
-
Validate the test completes successfully

Confirmation -
Click Save
User and Group provisioning
-
In the Microsoft Entra ID provisioning app, go to Manage -> Provisioning
-
Expand Mappings
-
Click the “Provision Microsoft Entra ID Users” link

-
For the following attributes, click the Edit button and set the field “Default value if null (optional)” to an underscore:
- “name.familyName”
- “name.givenName”
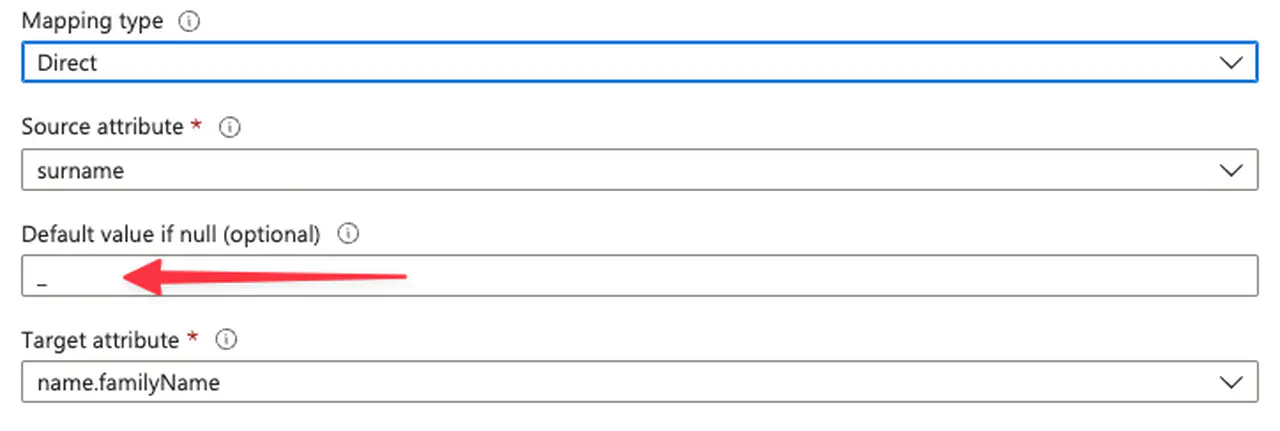
Configure Entra ID user mappings
-
Click OK
-
Click Save at the top and confirm the changes
-
Go back to the Provisioning -> Mapping and click the “Provision Microsoft Entra ID Groups” link
-
Click Edit for the “email” attribute and change “GROUPS_DOMAIN” match your own FQDN
- “Mapping type”: Expression
- “Expression”: “Join(”@", NormalizeDiacritics(StripSpaces([displayName])), “GROUPS_DOMAIN”)"
- “Target attribute”: email
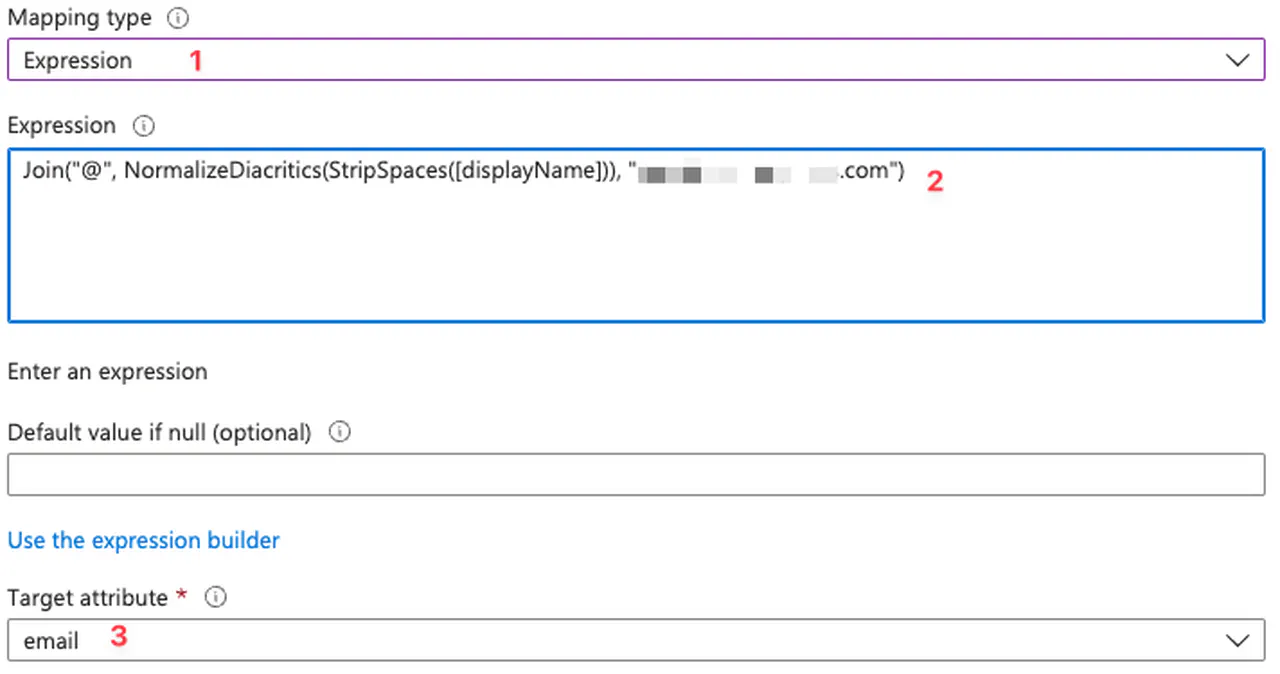
Configure Entra ID group mappings
-
Towards the bottom, click “Add New Mapping”
-
Use the following options to indicate which OU to provision user accounts in
- Mapping type: Constant
- Constant Value: /Users
- Target attribute: OrgUnitPath
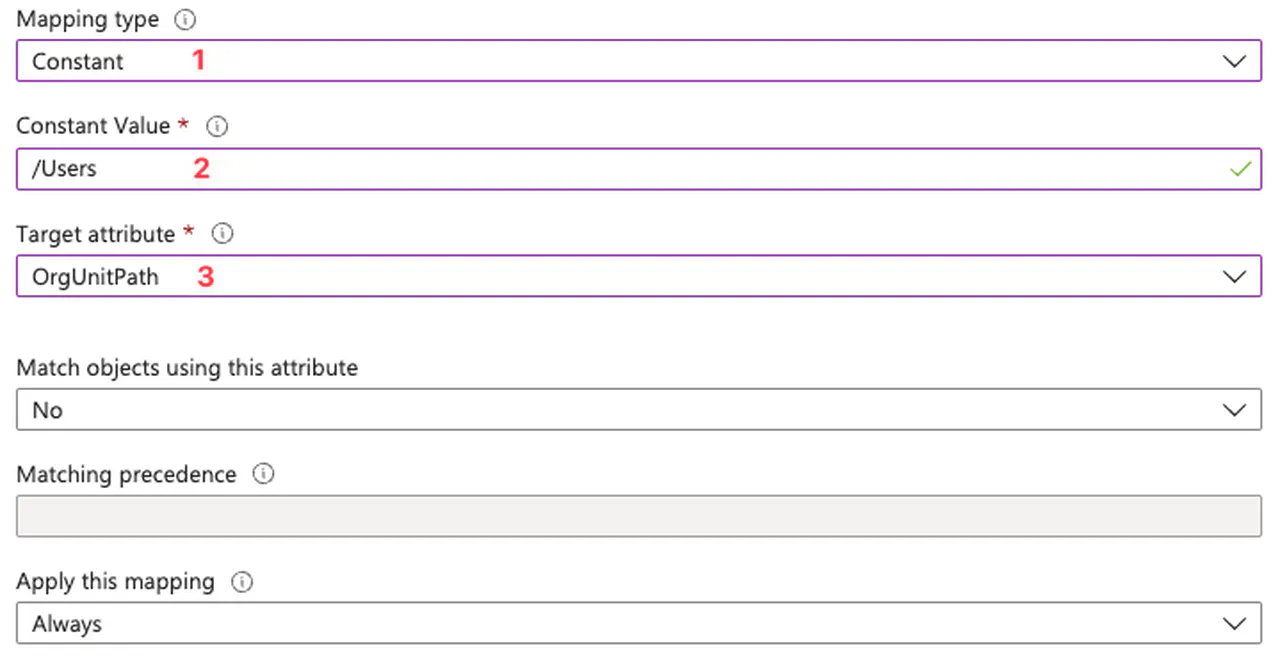
Configure provisioning OU
-
Click OK
-
Click Save and confirm
Assigning user accounts
-
On the Microsoft Entra ID provisioning app, go to Manage -> Users and groups
-
Add one or more users to provision
-
Click Select
-
Click Assign
-
Your result, should look similar to this
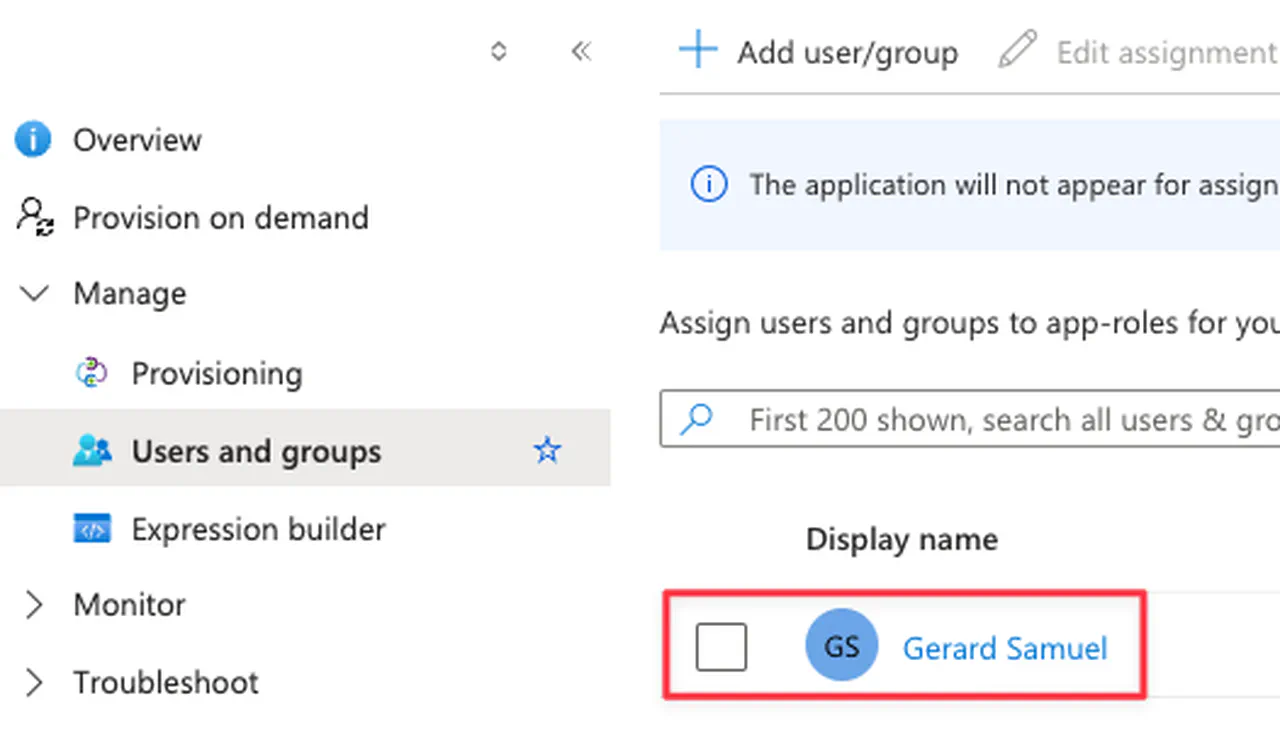
Provisioning example
Enable provisioning
-
In the Microsoft Entra ID provisioning app, go to Manage -> Provisioning
-
Click the “Edit Provisioning” pencil at the top
-
Under Settings, validate scope is set to “Sync only assigned users and groups”
-
Under Settings, enable “Prevent accidental deletion” and enter a threshold of how many accounts the application can delete/disable users automatically
-
Set Provisioning Status to “On”
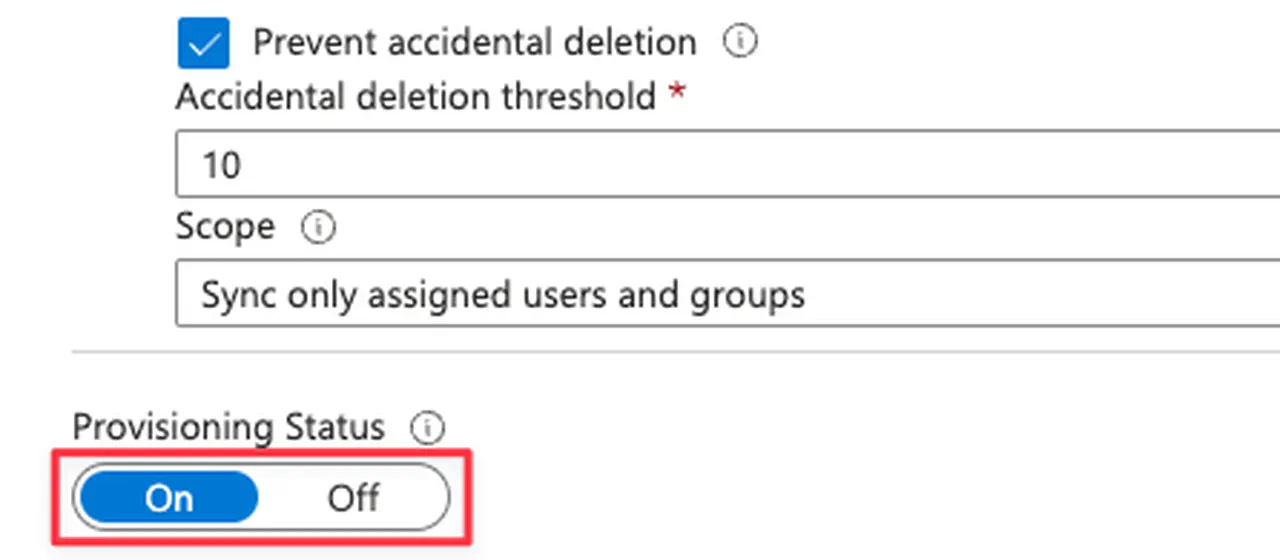
Turning on user provisioning -
Click Save
-
Give the process some time (5-10 minutes) to execute
-
On the provisioning overview page, you should see the status of the provisioning job
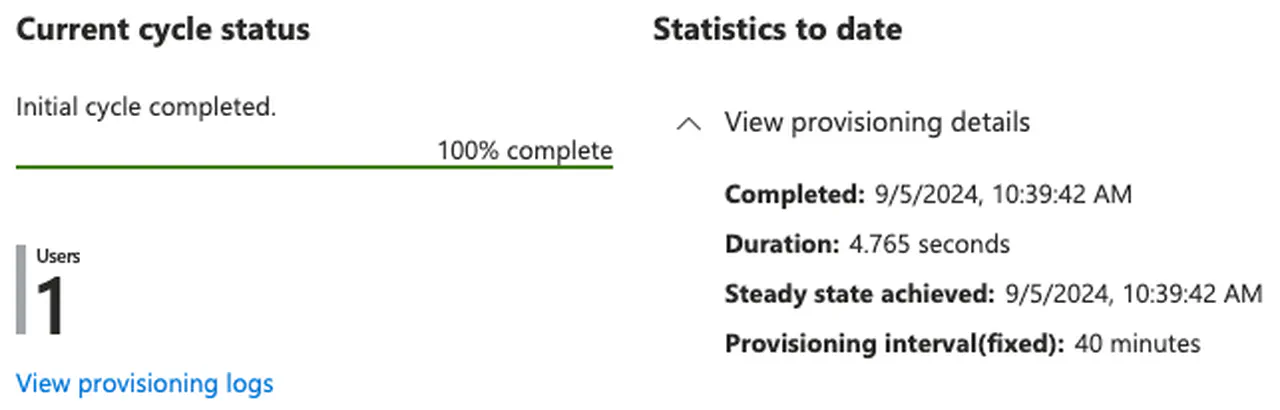
Entra ID provisioning status -
In Google Admin, go to Reporting -> Audit and investigation -> Admin log events. You should be able to find a log entry indicating when the account was created in Cloud Identity.
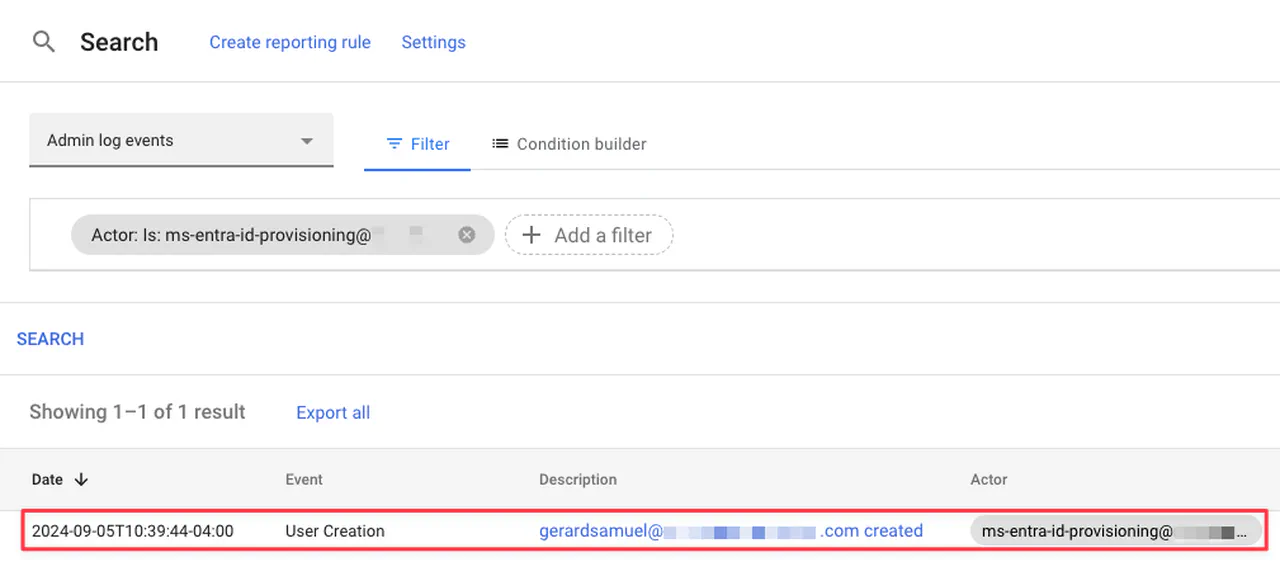
Google Admin provisioning status
Wrap up
In this article, I created a new relationship with Google Cloud Identity. I used a Microsoft Entra ID application to provision accounts and groups to Google Cloud Identity from Entra ID. In another article, I will provide the steps for configuring SAML/Single sign-on authentication.